Today we’re going to setup a media-center hub with OpenELEC/XBMC and a ~$30 Broadcom BCM970015 Crystal HD Decoder card on an old first-generation AppleTV. With a 1 GHz Pentium M CPU, only 256 MB of RAM and an onboard NVIDIA GeForce Go 7300 graphics processor and software video decoding, the first-generation Apple TV isn’t much of a media center device by todays standards. Installing XBMC via OpenELEC and adding hardware video decoding by way of the ~$30 Broadcom BCM970015 Crystal HD PCI Express card turns this device into media center capable of playing many video formats at up to 1080p resolution. Because all of our other devices, (ATV2, iPads, iPad-mini, iPods, iPhones, Nexus 7, etc.), are running XBMC 12.1 – Frodo, we are also going to add a large amount of USB storage to the Apple TV to store and share all of our media to all the devices on our network. This gives us one central location to store and manage all of our movies, music and television shows while, most importantly, providing cross-platform compatibility. As an added bonus, we can release our DRM-free media from the clutches on iTunes.
This process is completed from from either a Linux or Mac OS computer. If you are running Windows, you can download and install Oracle’s VirtualBox and follow my post to install a minimal Linux Virtual Machine to perform the Swiss Army Knife USB installation.
If you need to enable the component video output for this device, you can read my post to enable Component video on OpenELEC AppleTV 1G.
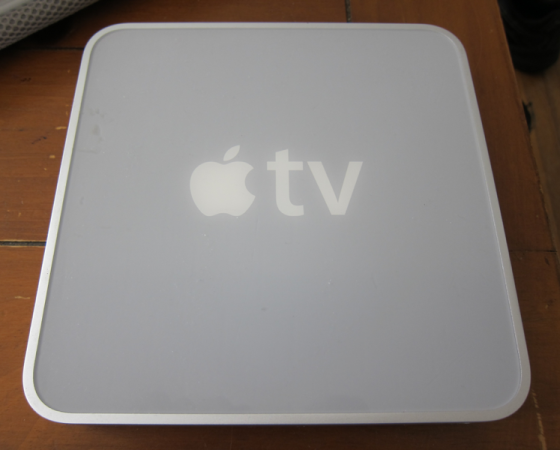
Here is our old, bone-stock AppleTV 1G.

To start off with this project, we’re going to crack open the Apple TV. We flip the AppleTV over and gently peel back one corner of the rubber pad to gain access to the screw. Using a T-10 TORX bit, remove the screw.

Once this screw has been removed, we repeat this process to remove the remaining three screws.

After we’ve removed all four screws, we slide the base toward the back of the device and lift the front of the base away. At this point, we can remove the IDE Hard Disk cable from the motherboard and set the base aside.
Now locate the PCI Express Mini WiFi card located near the center of the motherboard near the fan.

Gently pry off the two WiFi antenna clips from the Broadcom WiFi card and, using a T-9 TORX bit, remove the single screw that secures the card. After removing the screw, the card will slide out of the PCI Slot.

Now we can insert our Broadcom BCM970015 Crystal HD PCI Express card into the PCI slot on the AppleTV’s motherboard and secure the card with the T-9 TORX screw.

That’s it for the hardware. Now we can plug the IDE Hard Disk cable back into the motherboard and put the base back on the device by sliding the back of the base in first and then securing it with the four screws we removed earlier.
Now we can create an OpenELEC/XBMC, (Kodi) installation drive. I’m going to use a 4GB USB memory stick as installation media.
We will create the installation media in three steps. The commands vary slightly from Mac to Linux, so use which ever fits your platform.
Step 1. – Download installer script.
Open a terminal and
For Mac: curl -O http://chewitt.openelec.tv/singleboot/swissarmyknife_osx.sh
For Linux: wget http://chewitt.openelec.tv/singleboot/swissarmyknife_linux.sh
Step 2. Make installer script executable.
For Mac: chmod +x swissarmyknife_osx.sh
For Linux: chmod +x swissarmyknife_linux.sh
Step 3. Create bootable installer USB stick.
For Mac: sudo ./swissarmyknife_osx.sh
For Linux: sudo ./swissarmyknife_linux.sh
The script will download the packages needed to create the bootable Openelec/XBMC installation media.
The method listed above will create an installer that will erase the AppleTV’s internal hard disk and install Linux/XBMC. If you prefer to run OpenELEC/XBMC from the usb key, (overall slower and less responsive) without overwriting the internal hard disk in the AppleTV, you can do so by adding the install-usb option to the end of the command in step 3.
Now that our installation media has been created, we can plug it into the AppleTV and hook up the ethernet cable, HDMI and power. The AppleTV will boot to the USB key and proceed with the automated installation process. Once the installation has completed, the device will display a message telling us to remove the USB key and reboot the device.
Now our AppleTV will boot into XBMC. To be a proper XBMC Hub for our media, I’m going to add some storage volume by attaching an external USB Disk. I’ve already partitioned and formatted a 2TB external device to ext4 for use in this media center device so I just need to plug it into the AppleTV and boot up.
We want this USB Disk to be available via SMB on our network, so we are going to need to setup the samba.conf file. First we need to confirm that the SaMBa server is configured to run at boot by going to System>OpenELEC>Services and clicking on Start Samba at boot.
Now browse to your AppleTV device from any computer on your network and open the Configfiles share. In the share you’ll see a file called samba.conf.sample. Rename this file to samba.conf and open it with a text editor.

If we don’t know our USB device Volume Name, we can get it by connecting to our AppleTV:
ssh -l root openelec
password is openelec
and then enter
mount<enter>
Our USB Volume should be the last entry as /dev/sdb1 on /var/media/<VOLUME_NAME>
So just add these lines to the bottom of the samba.conf file:
[SHARE-NAME]
path = /var/media/<VOLUME_NAME>
available = yes
browsable = yes
public = yes
writable = yes
Now another reboot and we should be able to access the share:

Now just copy your media to the shared USB disk and add the media to your XBMC library. To enable access to all of our media from our other XBMC devices, we will enable uPnp services on the AppleTV, (OpenELEC/XBMC) under the System Menu and then add the media as a uPnp share from each XBMC device on the network.
For this particular installation I am going to enable Component video on OpenELEC AppleTV 1G.
Because I’m storing all my movies on the AppleTV via an external USB storage device, I don’t need to be concerned with network throughput. However, if you will be accessing your media library via a network share then the onboard 10/100 NIC will become a bottleneck for large 1080p videos. In this case, I suggest connecting your OpenELEC/XBMC AppleTV to your LAN via a USB gigabit network interface card with the ASIX AX88178 Chipset such as the $25 Pluggable USB 2.0 to 10/100/1000 Gigabit Ethernet LAN Wired Network Adapter.
Hi
This article seems quite usefull, I’ve got a mate who’s seem my monster media center/server and quite fancied one himself and he just so happens to have an apple TV kicking about that he’s not useing. I had a couple of questions:
What build does this install the intel GMA one?
Is everything in openElec for the CrystalHD or is there driver install required?
Is there any special config required to make it use the Crystal HD?
How do you output the sound to the TV, i was planning to use a DVI to HDMI cable but I don’t think that will cover the audio, will have to look into whether his TV can take HDMI for Video and another source for Audio….
Thanks
Hi Loz,
This process installs a build of OpenELEC which is custom built specifically for the AppleTV hardware. Drivers are included in this build for the BCM970012 and BCM970015 Crystal HD cards as well as a graphics driver to support audio over HDMI. Audio works with this build over HDMI or the Left/Right audio ports by selecting the output in XBMC settings. The Crystal HD is enabled for hardware decoding by default allowing for full 1080p playback of just about any file format.
cheers, Nathan
Hi,
I like the look of this guide but does this card still work without the installation of xbmc? (Just stock firmware?)
Thanks
Ken
Unfortunately there are no drivers for the hardware decoder included in the default Mac OS installation on the Apple TV.
Hi,
I already installed openElec on my ATV and upgraded the Hardware Card afterwards. Do I have to reinstall openElec to make the Card work?
Regards Julian
You shouldn’t need to reinstall. The OS should recognize the card and load the driver.