Updated July 3, 2013 for CraftBukkit 1.6.1 R0.1
I’ve setup Oracle’s VirtualBox to run a virtual machine on my Mac Pro and installed an Ubuntu 10.04 LTS Server with the virtual machine optimized kernel. Now I’m going to install the Bukkit Minecraft dedicated server. I’ve added a tutorial on how to add some plugins to this server which also has links to download this server as a ready-to-run VirtualBox Appliance
All of the linux console commands in this tutorial are in bold.
The first step is to login to the machine through SSH or at the console and update aptitude:
nmino@mcserver:~$ sudo apt-get update
And then upgrade the installed packages:
nmino@mcserver:~$ sudo apt-get upgrade all
My minimal installation of ubuntu is going to need a few pieces of software before Bukkit will run:
The first piece of software that I’m going to install is the wget package used to download the Bukkit files:
nmino@mcserver:~$ sudo apt-get install wget
And I’m going to install nano as my editor:
nmino@mcserver:~$ sudo apt-get install nano
Now I’ll need to install the required Java runtime and the necessary dependencies:
nmino@mcserver:~$ sudo apt-get install openjdk-6-jre
Reading package lists… Done
Building dependency tree
Reading state information… Done
The following extra packages will be installed:
ca-certificates-java icedtea-6-jre-cacao icedtea-netx java-common libasound2 libavahi-client3
libavahi-common-data libavahi-common3 libcups2 libflac8 libgif4 libice6 libjpeg62 libnspr4-0d
libnss3-1d libogg0 libpcsclite1 libpulse0 libpython2.6 libsm6 libsndfile1 libvorbis0a
libvorbisenc2 libxi6 libxrender1 libxtst6 openjdk-6-jre-headless openjdk-6-jre-lib
ttf-dejavu-core ttf-dejavu-extra tzdata-java x11-common
Suggested packages:
default-jre equivs libasound2-plugins cups-common pcscd pulseaudio icedtea-plugin libnss-mdns
sun-java6-fonts ttf-baekmuk ttf-unfonts ttf-unfonts-core ttf-sazanami-gothic ttf-kochi-gothic
ttf-sazanami-mincho ttf-kochi-mincho ttf-wqy-microhei ttf-wqy-zenhei ttf-indic-fonts-core
ttf-telugu-fonts ttf-oriya-fonts ttf-kannada-fonts ttf-bengali-fonts
The following NEW packages will be installed:
ca-certificates-java icedtea-6-jre-cacao icedtea-netx java-common libasound2 libavahi-client3
libavahi-common-data libavahi-common3 libcups2 libflac8 libgif4 libice6 libjpeg62 libnspr4-0d
libnss3-1d libogg0 libpcsclite1 libpulse0 libpython2.6 libsm6 libsndfile1 libvorbis0a
libvorbisenc2 libxi6 libxrender1 libxtst6 openjdk-6-jre openjdk-6-jre-headless openjdk-6-jre-lib
ttf-dejavu-core ttf-dejavu-extra tzdata-java x11-common
0 upgraded, 33 newly installed, 0 to remove and 2 not upgraded.
Need to get 43.6MB of archives.
After this operation, 115MB of additional disk space will be used.
Do you want to continue [Y/n]?
This defaults to Yes, so just hit enter.
Now I’m going to install the screen package so that I can start the server in screen and disconnect while leaving the server running:
nmino@mcserver:~$ sudo apt-get install screen
Now I’m going to make a directory for my server files and go into that directory to download the files:
nmino@mcserver:~$ mkdir bukkitserver
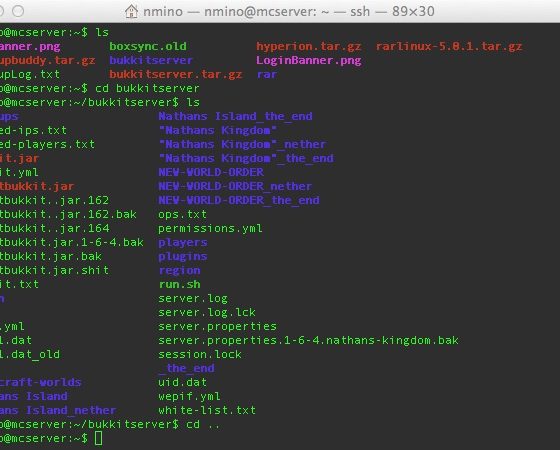
nmino@mcserver:~$ cd bukkitserver
nmino@mcserver:~/bukkitserver$
Now that I’m in the directory, I’m going to download the Bukkit server file. I’ll go over to the website at: http://dl.bukkit.org/downloads/craftbukkit/ and collect the URL to the latest craftbukkit.jar. I like to use the latest development build. Which is going to be craftbukkit 1.6.1. We are now going to download that jar file to our server using wget:
nmino@mcserver:~/bukkitserver$ wget http://dl.bukkit.org/downloads/craftbukkit/get/02193_1.6.1-R0.1/craftbukkit-dev.jar
This one is a development build, so for ease of use and clarity I’m going to remove the -dev from the file name by entering the following command:
nmino@mcserver:~/bukkitserver$ mv craftbukkit-dev.jar craftbukkit.jar
Now let’s make a simple script called run.sh to start the server:
nmino@mcserver:~/bukkitserver$ nano run.sh
I’m going to put the following into the script:
#!/bin/sh
BINDIR=$(dirname “$(readlink -fn “$0″)”)
cd “$BINDIR”
screen -S bukkitserver java -Xms1536M -Xmx1536M -jar craftbukkit.jar -o false
From nano, hit ctrl-x to exit and hit enter when prompted to save the changes. This will launch the server in a screen session called bukkitserver and allocate 1.5GB RAM to the server while running in “offline” mode.
The script needs to be marked as executable:
nmino@mcserver:~/bukkitserver$ chmod +x run.sh
Now we can start the server so it can do it’s initial boot and create all the necessary server files as well as generate a new world:
nmino@mcserver:~/bukkitserver$ ./run.sh
To exit from the the server console without stopping the server, simply press ctrl-a and then d to drop back to the linux command line.
To get back to the server console it’s a matter of simply reconnecting to the screen session:
nmino@mcserver:~/bukkitserver$ screen -r bukkitserver
You now have a running bukkit server that’s accessible on your LAN from the Multiplayer option in Minecraft.
To shutdown the server, go back into the screen session and type stop in the servers console and hit enter.
Now that the server is running, you can follow my other tutorial to add some plugins where you can also download my Ubuntu Minecraft Bukkit VirtualBox appliance.
I do trust all the ideas you’ve presented in your post. They’re very convincing and can certainly work. Nonetheless, the posts are very short for newbies. Could you please extend them a bit from subsequent time? Thanks for the post.